|
|
Use Launcher as a Portable Launcher and Menu System on USB Sticks
While Launcher comes in an installer, you can easily use it as portable menu system and program launcher. Just follow a few steps and it is ready for use on portable disks and sticks.
How to Use Launcher in Portable Mode
Launcher comes in an executable installer. However, after installation, it is easy to turn Launcher into a portable file and program launcher:
You can read more about portable Launcher configuration in configuring Launcher after installation.
- Close and exit Launcher software. Find the Launcher installation directory you chose during installation:
- Find the file muc.ini. Open it in a text editor.
- Edit the file to look like this:
[Misc]
DataAccess=app
- Launcher will now use and place all data in sub directories to its own application installation path,
usually:
C:\Program Files\Micro-Sys\Launcher\shortcuts\
Please note that making this change alters how Launcher locates its shortcuts data directory.
If you still want your old shortcuts, you can copy them from your Windows default user documents directory, usually:
C:\Users\%user%\Documents\Micro-Sys\Launcher\shortcuts\
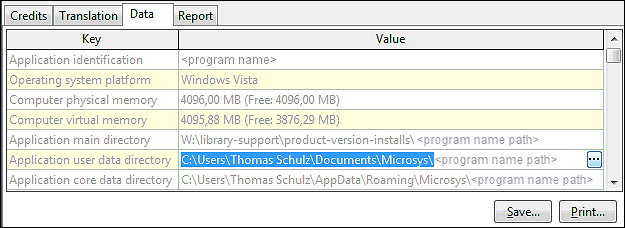
You can check what paths Launcher uses in Help | About | Data:

- Now, copy the entire Launcher directory into e.g. USB stick using any file manager such as Windows Explorer.
- When using Launcher on portables drives, you will need to make sure that all Launcher shortcuts that points to files and applications located on the USB stick use relative paths. This is because Windows often assigns different drive letters when removing/inserting portable drives such as USB sticks.
You can read more about portable Launcher configuration in configuring Launcher after installation.
Launcher Shortcuts and Portable Mode
- Assuming following structure (simplified):
- Launcher:
- Launcher.exe
- history.txt
- Documents:
- example.txt
- some-file-in-root.txt
- Launcher:

- Add some programs and items to launch.
- In above example, history.txt directory path is Q:\Launcher\.
- We know it is located in the same directory as Launcher.
- We correct the path to empty and apply with the button next to it.
- Relative path for example.txt" is ..\Documents\
- Relative path for some-file-in-root.txt is ..\
